


How to Modify Your Amazon Com Video Settings?
The video settings on Amazon.com significantly influence your viewing experience. Modifying these options enables you to enhance video quality, handle subtitles, and regulate data consumption, particularly when utilizing mobile devices or communal networks. Adjusting these settings guarantees a smooth, individualized streaming experience that suits your preferences and device features. In this guide, we will explain how to modify www.amazon.com/video/settings.
How to Enabling or Disabling Subtitles and Captions
If you want to enable subtitles, switch their language, or modify their appearance, Amazon Prime provides simple settings to follow. Here’s an easy guide for handling subtitles on your device —
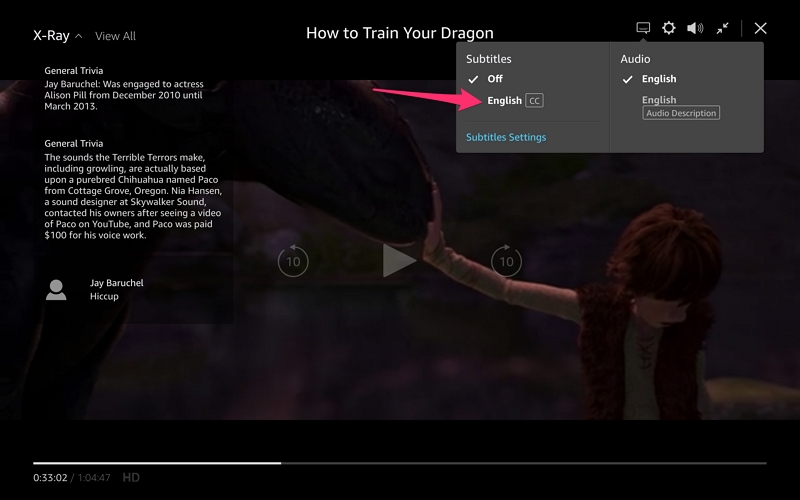
Step 1: On the overview screen of the title, move by pressing up and then right to locate the subtitles option. If subtitles are present, you will notice the Subtitles or Closed Caption (CC) symbol.
Step 2: While viewing a title, click the CC/Subtitles icon on your playback screen to access the subtitle menu. You can then switch subtitles on or off as you wish.
Step 3: In the same subtitle menu, you can select a language if one is offered. Just choose your preferred language, and the subtitles will automatically refresh while you watch.
How to change subtitle language and appearance
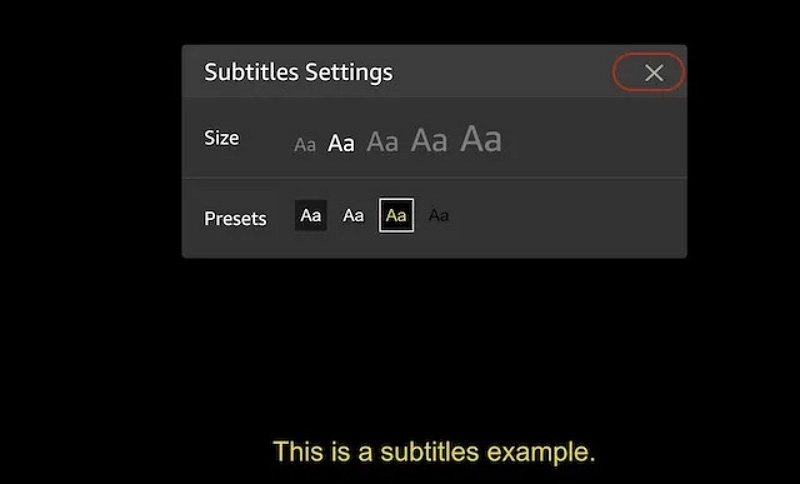
Step 1: Access the “Subtitles Settings” from the menu where you enabled the subtitles.
Step 2: Adjust the size and color of the subtitles to enhance visibility and readability.
Step 3: If your device allows, you can establish subtitle presets to swiftly use your preferred settings whenever required.
How to Adjusting Stream Quality on Different Device
When consuming streamed content, the quality of the video significantly impacts your overall viewing experience. When viewing films, TV programs, or documentaries, you’ll frequently observe choices such as 480p, 720p, 1080p, and even UHD. These figures denote the video resolution, where larger numbers signify clearer and crisper visuals. Here is a manual on how to adjust www amazon com video settings on multiple devices –
Adjusting Stream Quality on Smartphones
The settings of your streaming app allow you to easily control the streaming quality on smartphones. Here’s how to modify Amazon com Prime Video settings –
Step 1: Open the Amazon Prime Video application on your mobile device. Log in to your Amazon Prime account.
Step 2: Make sure you are linked to a Wi-Fi network for optimal streaming quality. Mobile networks may restrict the quality of videos.
Step 3: Disable battery saver or data saver settings since they can limit streaming quality.
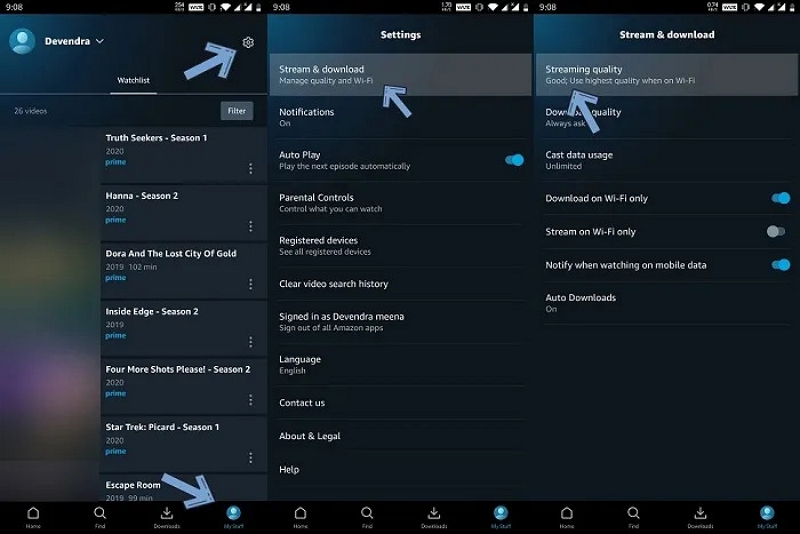
Step 4: Select the “My Stuff” section, then press the settings icon located at the top right.
Step 5: Click on “Streaming Quality” under “Stream & Download” and select the best quality for Wi-Fi use or modify it based on your data plan.
Step 6: Confirm that you have chosen the “High Quality on Wi-Fi” setting to enhance streaming performance.
Adjusting Stream Quality on a Firestick
The Amazon Firestick enables users to adjust streaming options, such as video quality. Here’s how to amazon.com video settings on a Firestick –
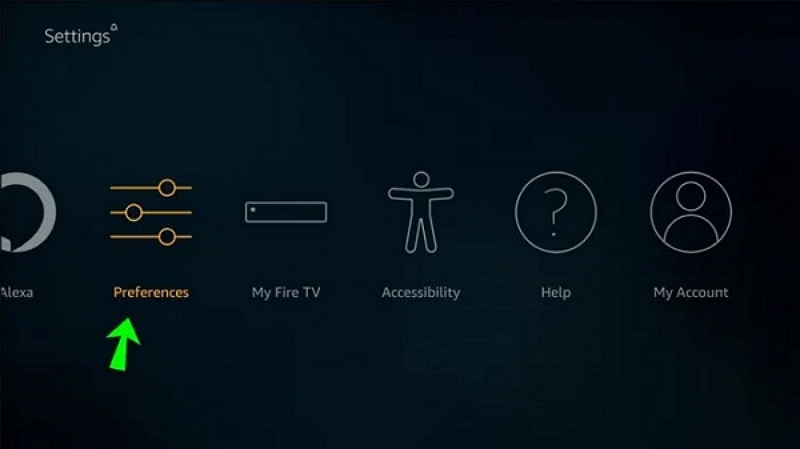
Step 1: Go to the “Settings” option on your Firestick. Locate and choose “Preferences” in the settings menu.
Step 2: Enable the “Data Monitoring” option to monitor your data consumption.
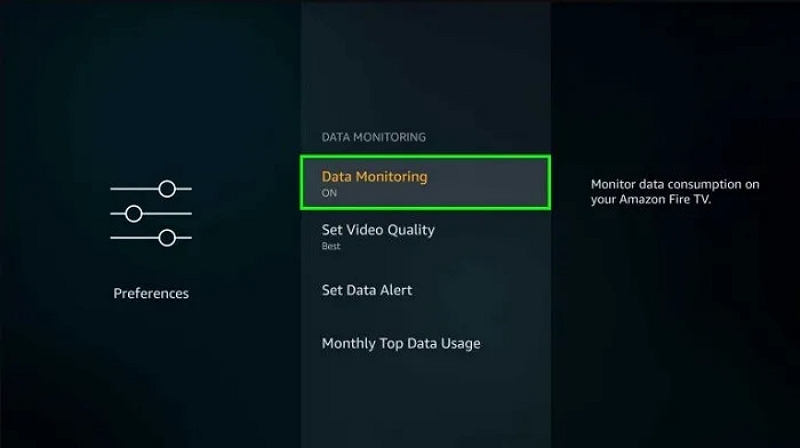
Step 3: In the “Data Monitoring” section, choose “Set Video Quality”.
Step 4: Choose from “Good”, “Better”, or “Best” based on your internet speed and data needs.
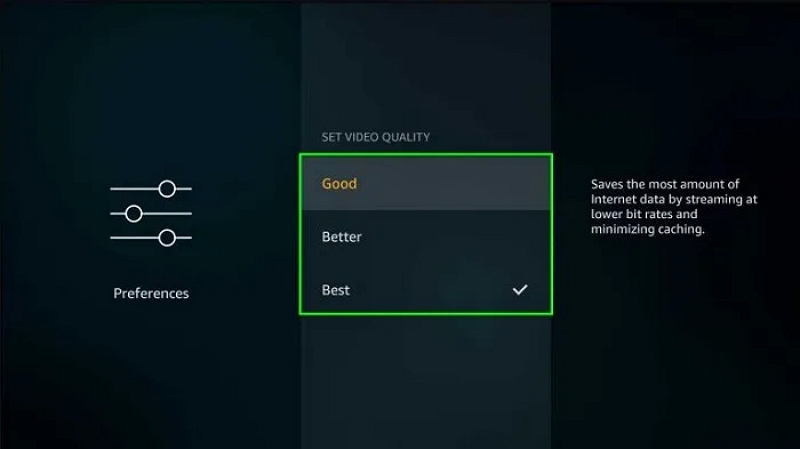
Step 5: Tap the Home button to save your preferences and go back to the main screen.
Adjusting Stream Quality on Apple TV
On Apple TV, you can modify video quality according to your preferences.
Step 1: Open the Amazon Prime Video application on your Apple TV.
Step 2: Select the “Streaming & Downloading” option by navigating to the Settings area.
Step 3: Select the quality setting according to your data consumption or choice (SD, HD, or UHD).

- SD (480p) consumes about 0.7 GB for every hour.
- HD (720p) consumes 1-2.5 GB each hour.
- Full HD (1080p) consumes 1.5-3 GB each hour.
- UHD (4K) utilizes as much as 8 GB each hour.
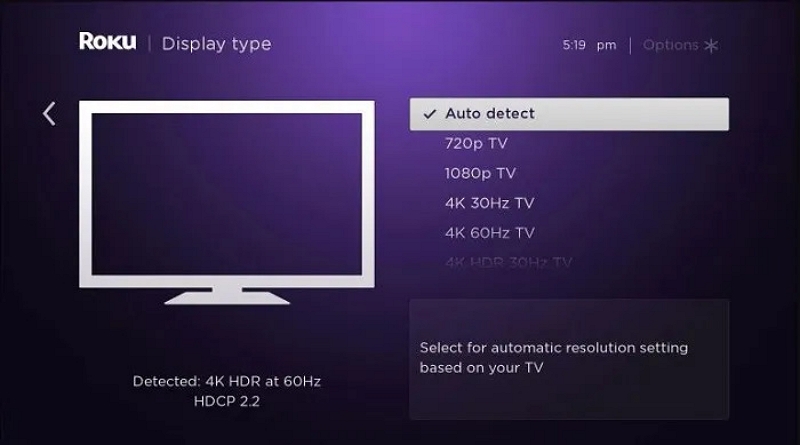
Adjusting Stream Quality on Roku
If you’re streaming Amazon Prime content on Roku, follow these steps to change the video quality –
Step 1: Hit the Home button on your Roku remote to open the home screen.
Step 2: Select “Choose Display Type” by clicking on “Settings”.
Step 3: Select from choices such as 4K HDR, 1080p, 720p, or additional formats, based on your TV’s features.
Step 4: If your Roku doesn’t permit manual quality adjustments, you can access your router’s traffic management section to modify the streaming bandwidth. Guarantee a convert speed of no less than 5MB/s for HD and 1MB/s for SD material.
How to Managing Playback Settings
To improve your experience while watching on Amazon Prime Video, modifying playback settings such as autoplay and speed can be beneficial. If you aim to regulate data consumption or enhance your streaming experience, follow these steps to adjust these settings –
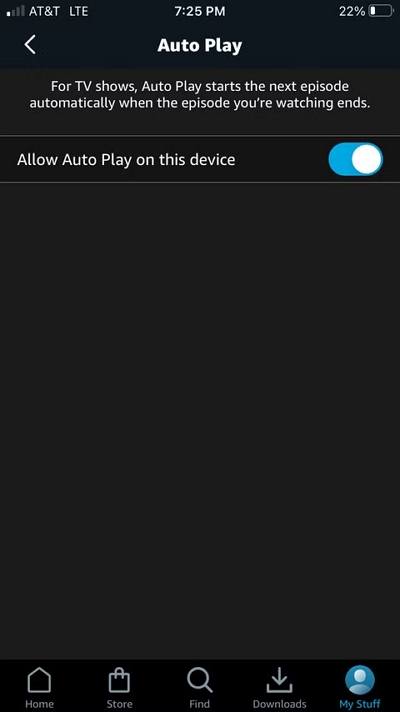
Adjusting autoplay settings
Autoplay can enhance uninterrupted viewing, but it might use additional data, particularly on mobile devices. To either turn it off or modify it, adhere to these instructions –
Step 1: Launch the Prime Video application or website.
Step 2: Navigate to the My Stuff area (on mobile) or your account settings (on desktop).
Step 3: Press or click on the Settings icon (gear icon).
Step 4: Select Autoplay from the options provided.
Step 5: Utilize the slider to enable or disable autoplay, or modify it to fit your preferences.
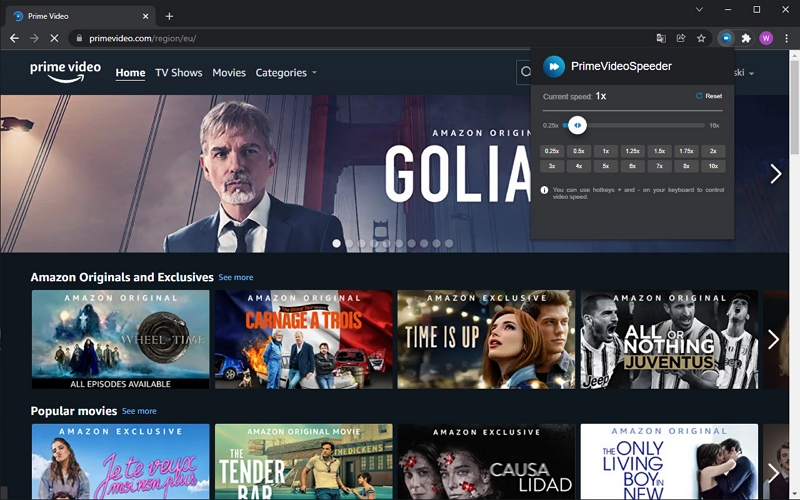
Changing playback speed
To adjust the pace of your viewing experience, you can utilize the Prime Video Speeder extension. Here’s how to adjust the playback speed –
Step 1: Add the Prime Video Speeder extension to your browser (compatible with Chrome, Firefox, etc.).
Step 2: After installation, launch Prime Video in your browser and play a video.
Step 3: Select the Speeder icon located in your browser’s toolbar.
Step 4: Select a playback speed ranging from 0.25x to 16x using the control panel.
Step 5: Have fun viewing your video at your chosen speed.
Exclusive Tip: Download Amazon Prime Shows that Allow Various Devices to Play?
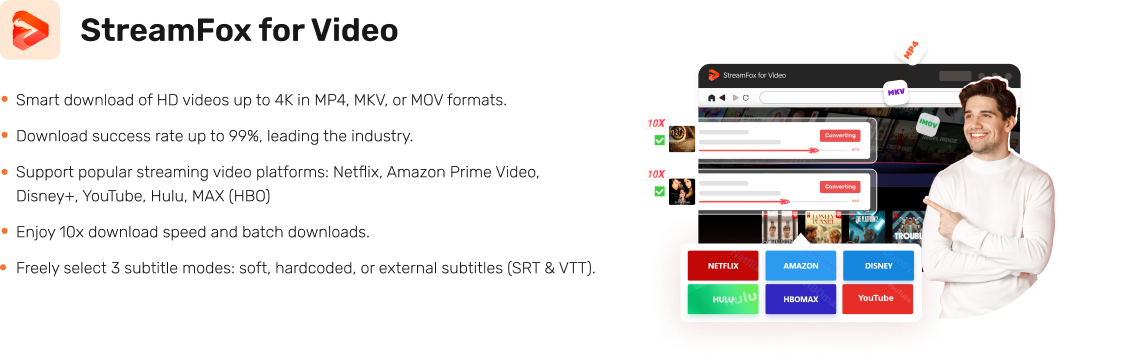
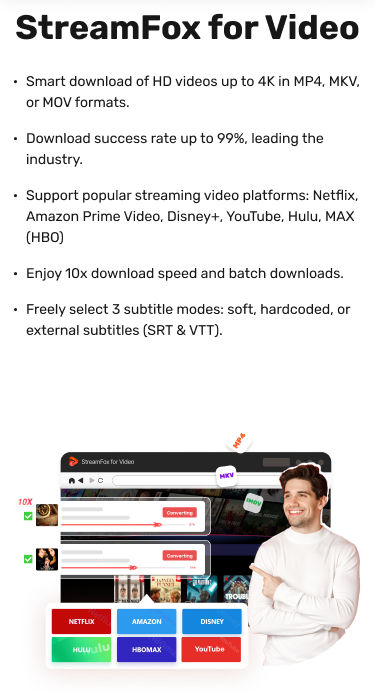
For converting shows and movies from Amazon Prime to watch offline, possessing the appropriate tool is crucial. You require a solution that offers high-quality converts, works on various devices, and is dependable enough to manage large files effectively. One such tool is StreamFox for Video. This comprehensive streaming video converter is crafted for users seeking a smooth experience when converting from leading streaming platforms, including Amazon Prime Video. It allows high-quality converts and is compatible with multiple devices. This makes it an ideal option for any streaming fan.
- Enjoy your converted videos on multiple devices, such as smartphones, tablets, laptops, and smart TVs.
- Works with well-known streaming services such as Netflix, Amazon Prime Video, Hulu, Disney+, YouTube, and MAX (HBO).
- Select from soft, hardcoded, or external subtitles (SRT & VTT file types).
- Acquire videos in HD, 1080p, or even 4K for an exceptionally immersive experience.
Follow these steps to convert Amazon Prime Shows using StreamFox for Video —
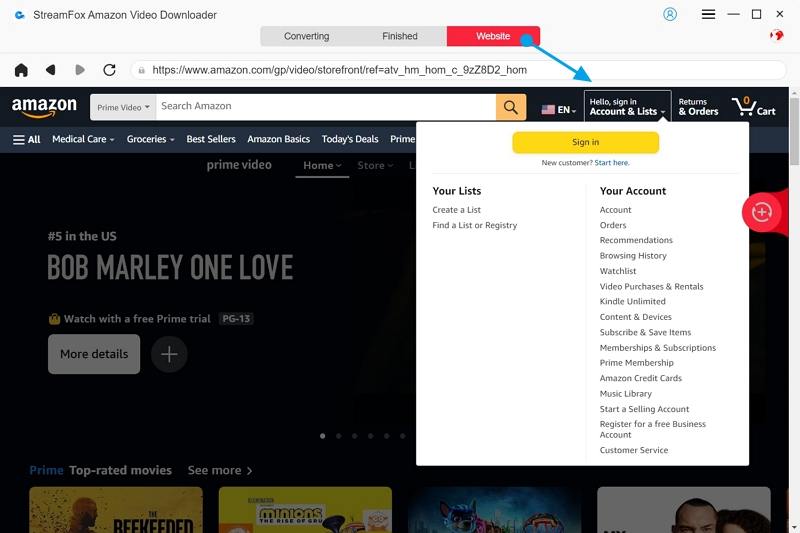
Step 1: Download and launch StreamFox for Video. Choose Amazon Prime Video as your preferred platform. When the Amazon Prime Video interface is displayed, sign in with your account information.
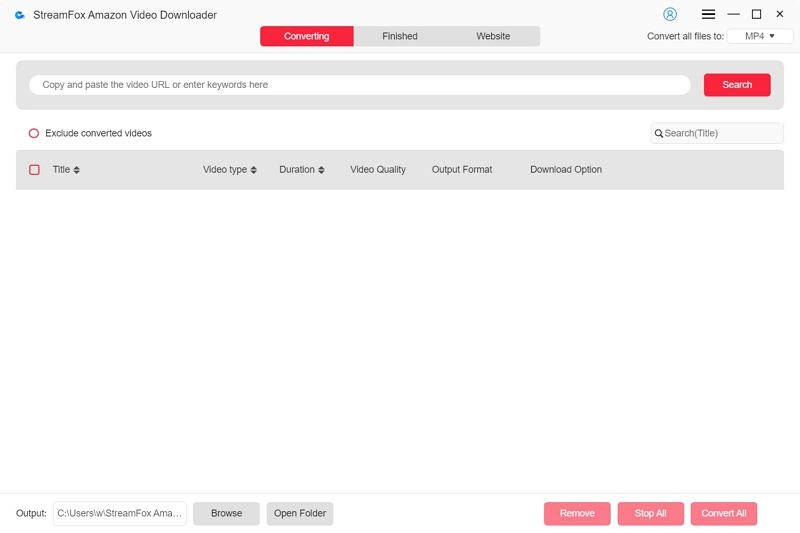
Step 2: Use the search box to locate particular content. You can input keywords or paste the exact URL of the show or episode.
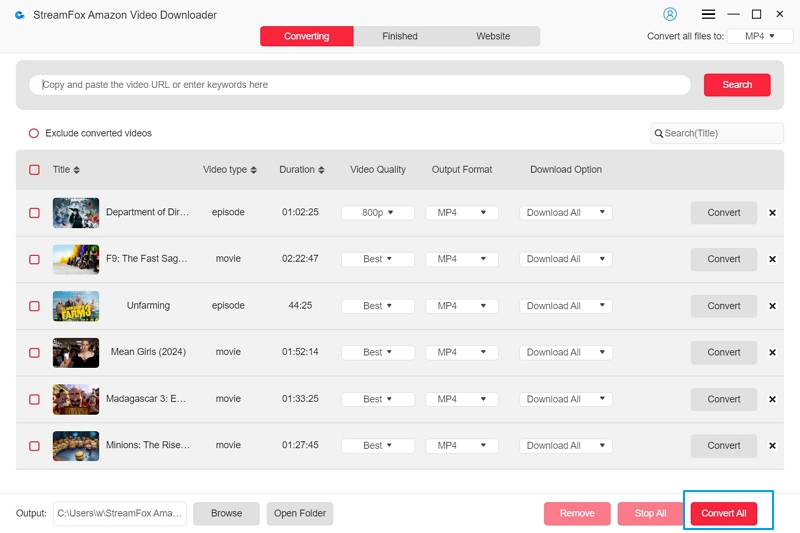
Step 3: In the “Converting” section, select your c for converts from the “Convert all files to” dropdown menu.
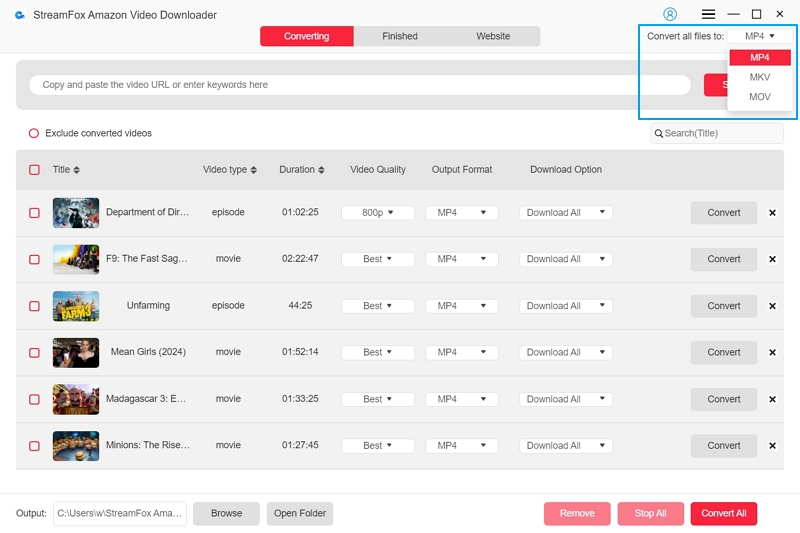
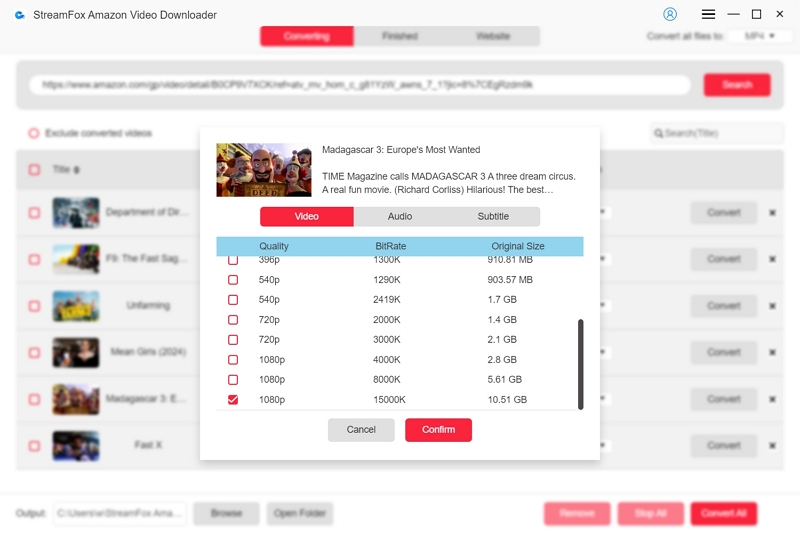
Step 4: For the best resolution, choose the top quality setting in the “Video Quality” dropdown menu. Moreover, you can select your desired audio and subtitle languages based on your preferences.
Step 5: After you have modified your settings, click on “Convert All” to initiate the converting procedure for the videos you chose.
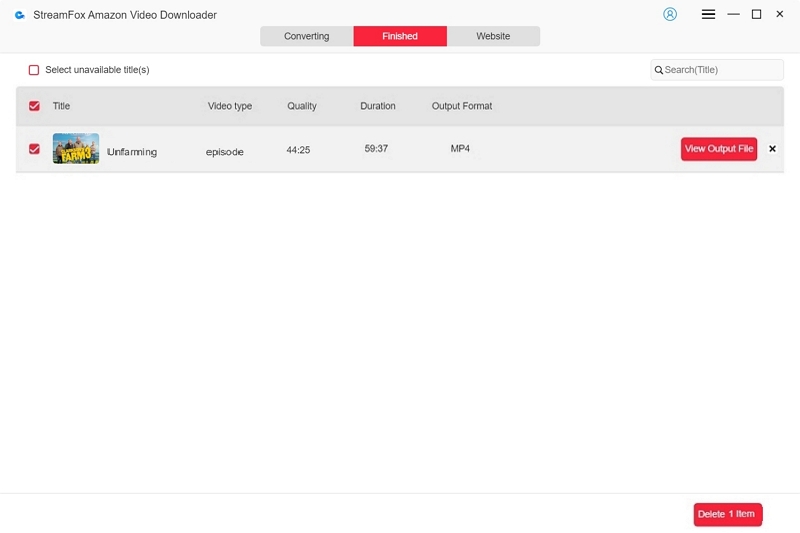
Step 6: Once the convert is finished, go to the “Finished” section. Click the “View Output File” icon to open your converted material. You can subsequently move the files to your chosen device for offline access.
FAQs
1. Why am I being charged for Prime Video if I have Amazon Prime?
If you are being billed for Prime Video, it might be because not every piece of content on Prime Video is covered by your Amazon Prime subscription. Although a variety of movies and shows are included at no extra charge with your subscription, some content may necessitate additional payment. This is a result of licensing contracts with distributors, which can differ. If a title isn’t labeled as “included with Prime”, you will incur a fee to rent or buy it. Always review the listing information to verify if the content is part of your membership.
2. How do I reset Amazon Prime Video?
To restore Amazon Prime Video settings, begin by going to the profile area. Choose the profile you wish to modify and, if prompted, sign in with your Amazon account details. Upon entry, find the choice to adjust settings, including Profile or Account PINs and limitations. Press the appropriate “Manage” button to modify or restore your Prime Video preferences, making sure your account settings meet your requirements.
3. Is Prime Video still free with Amazon Prime?
Yes, Prime Video is a perk that comes with an Amazon Prime subscription. By obtaining this membership, you unlock a wide array of TV shows and films that you can enjoy on your favorite devices. To begin streaming, you can go to the Prime Video website or install the app on your mobile device.
Conclusion
Modifying your Amazon video settings guarantees a tailored and enhanced streaming experience. To ensure a smooth convert experience, StreamFox for Video is strongly advised. This software provides top-notch converts from Amazon Prime Video and various other streaming services on multiple devices.