How to Add Spotify to OBS on PC/Mac
A live stream without music can get boring fast. The energy, the engagement, the mood—it all depends on sound. And whether you’re a gamer, virtual teacher, or online presenter, the right background music makes your session more immersive.
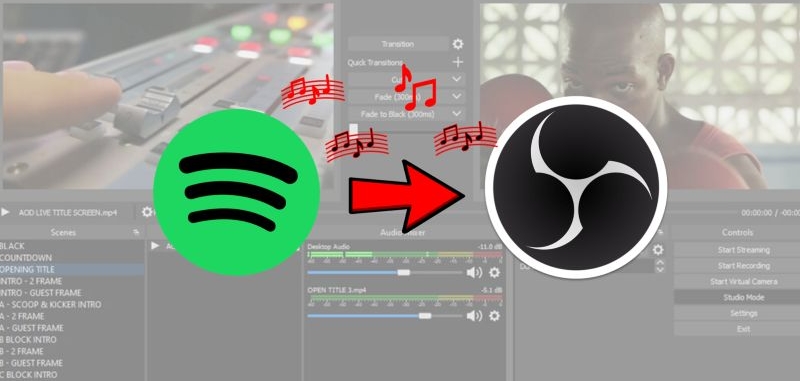
Yes, OBS Studio doesn’t come with built-in music support, but adding Spotify music is easy. You can display the Now Playing screen, use custom widgets, or capture only Spotify audio in your streams. This guide covers all the methods to add Spotify to OBS Studio whether you’re on a Mac or Windows computer, step by step.
How to Add Spotify to OBS as Media Source
When to Use This Way:
For those who want uninterrupted Spotify music playback while streaming—without ads, internet, or even a Premium subscription. You can get visuals using built-in filters in OBS studio. This method is also helpful when automatic bots are flagging when using Spotify music.
Having Spotify tracks locally stored on your computer is every streamer’s dream. After all, it doesn’t contribute to latency and play games or host sessions without ads. However, it’s also unimaginable to do this. That’s where StreamFox for Music changes the game.
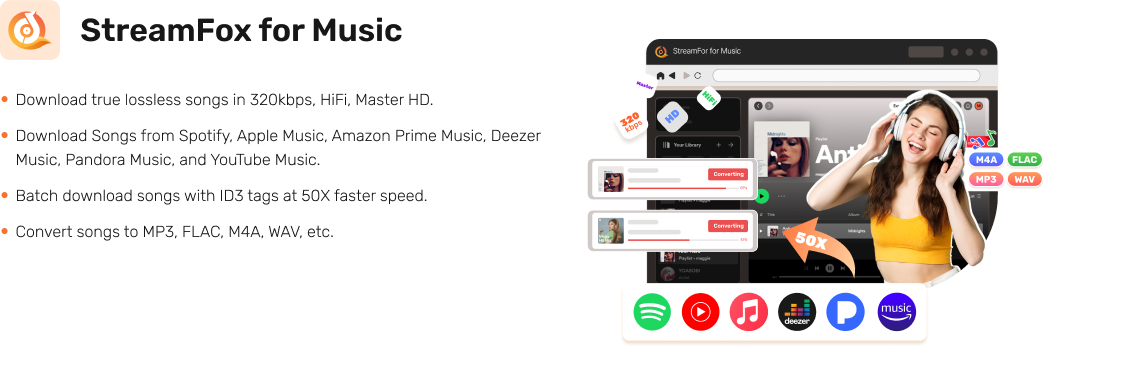
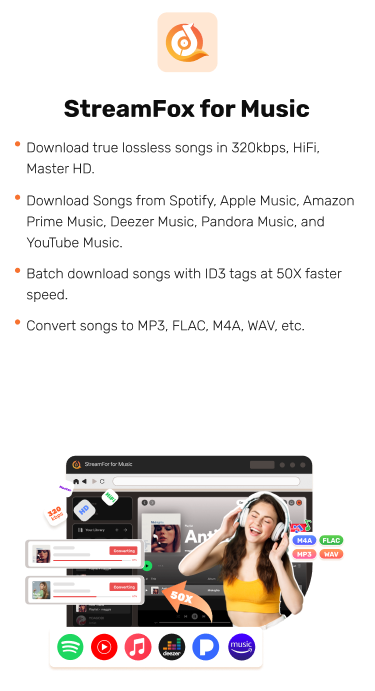
StreamFox for Music is a dedicated Spotify converter that allows you to convert and save songs, audiobooks, playlists, and entire albums directly to your computer. There are multiple export options like MP3, AAC, FLAC, or WAV formats. You don’t even need an active Spotify subscription to download the songs. Yet, you still get a high bitrate, up to 320kbps. Once saved, you can simply redirect these tracks to play during your streams via OBS.
- Built-in Spotify browser gives drag-and-drop functionality to browse and select tracks to convert.
- Each music file retains the original title, artist name, album name, and even cover art.
- Save entire playlists in one go with 10x speed and bulk processing, skipping the wait.
- Support Apple Music, Amazon Music, YouTube Music, and more, giving you an unlimited offline library of music for streams.
How to Save Spotify Music Without Premium
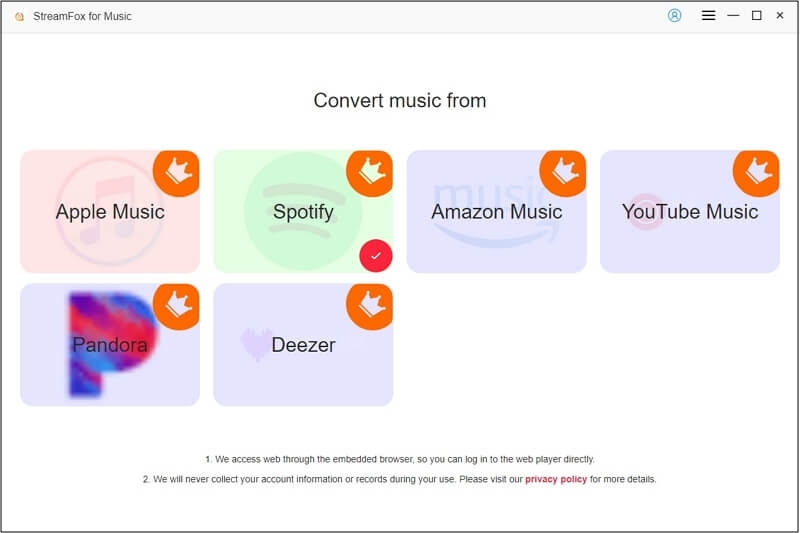
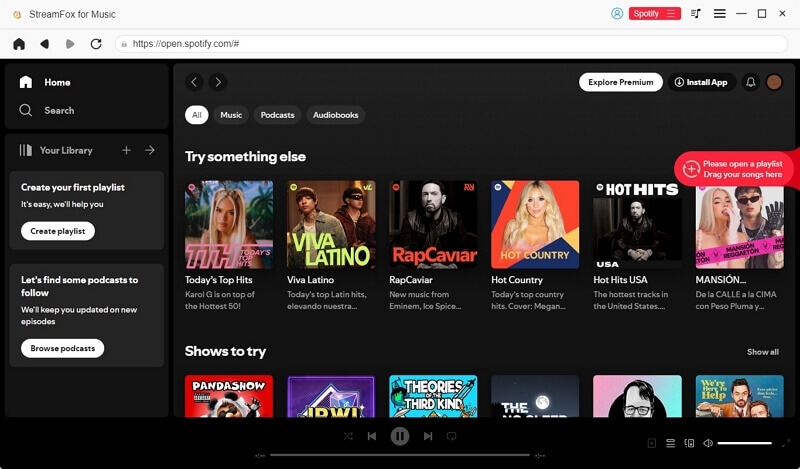
Step 1. Set up StreamFox for Music on your Windows or Mac computer. Select Spotify from the main screen.
Step 2. Sign in using your Spotify account—free or premium, both work.
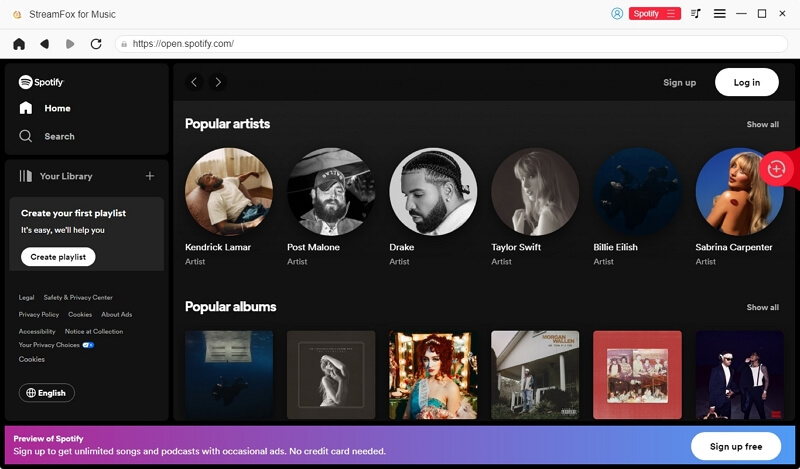
Step 3. Inside the built-in Spotify browser, browse your library and drag your songs, albums, or playlists for your OBS streams to the plus (+) icon at the top-right.
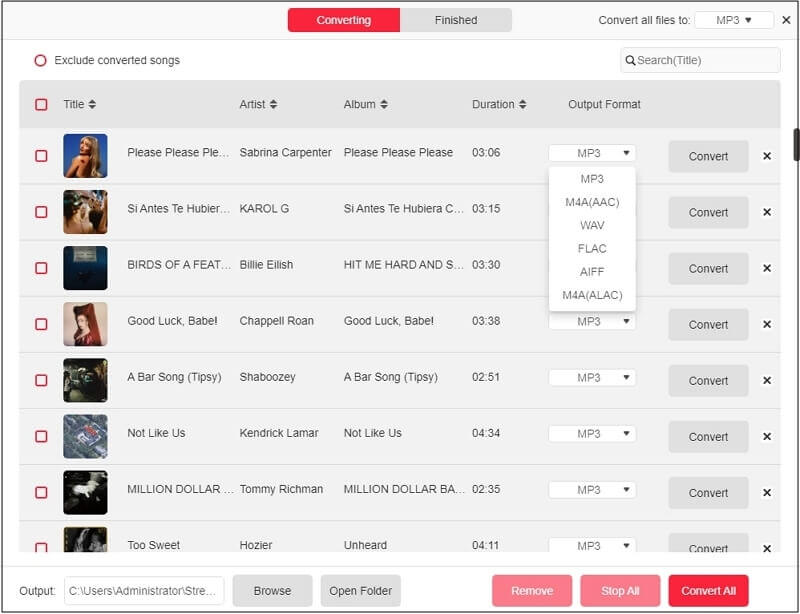
Step 4. Once everything is added, hit Convert All. The conversion will begin and the selected tracks will be saved to your computer in your chosen format like MP3, AAC, FLAC, or WAV.
Add Converted Spotify Songs to OBS as Media Source
You can locate the StreamFox-converted music in your Downloads directory. To bring them to the OBS studio, follow these steps:
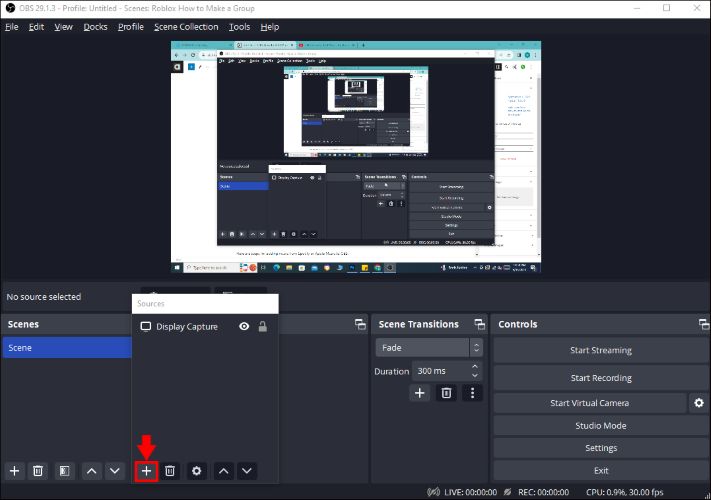
Step 1. Open OBS Studio and locate the Sources panel. Click the plus (+) button.
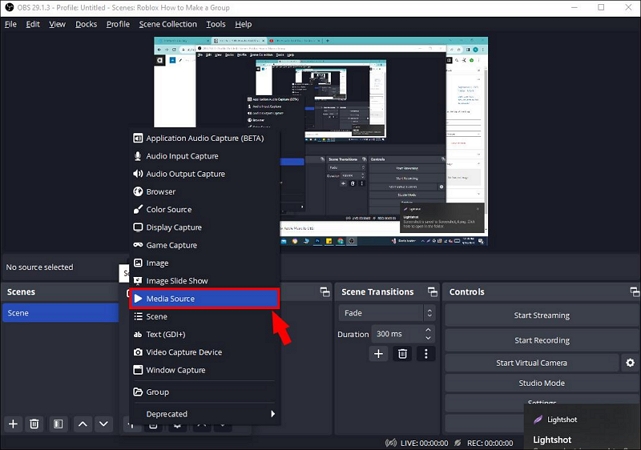
Step 2. From the list, choose Media Source.
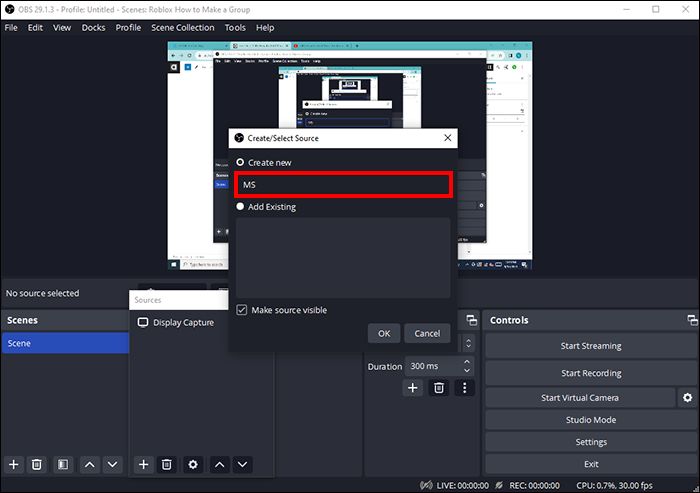
Step 3. A pop-up will appear, name your source something recognizable, like StreamFox Audioand click OK.
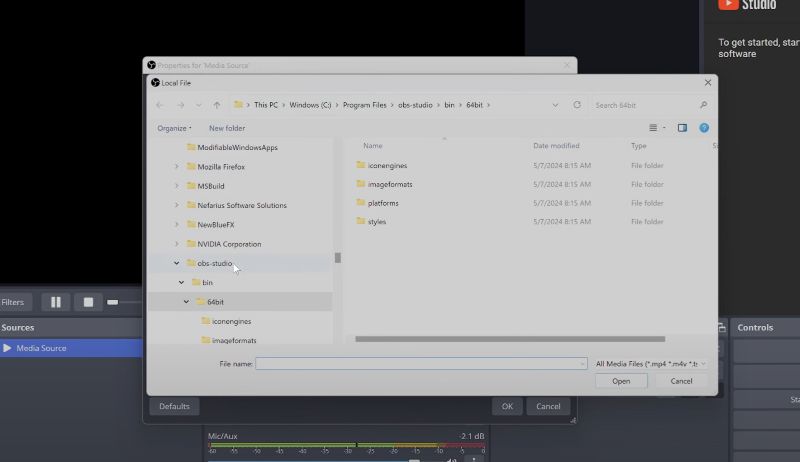
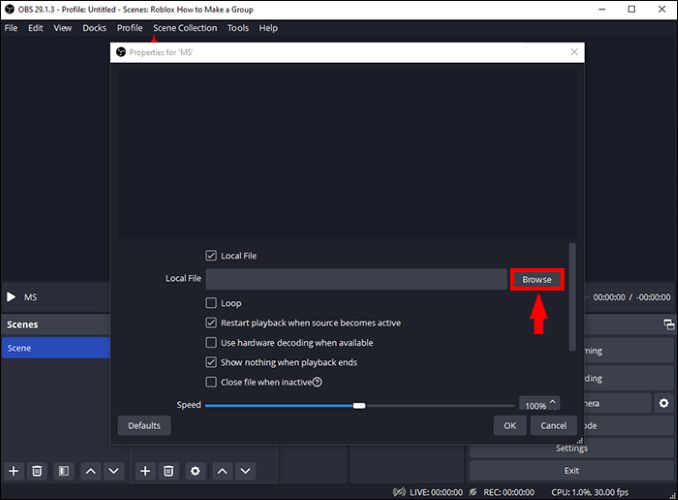
Step 4. In the Properties window, find the Browse button next to Local File. Click it and navigate to the StreamFox Music folder where your converted songs are stored.
Click OK. Now, whenever you stream, you can pull the StreamFox music source to listen to Spotify songs offline.
How to Add Spotify Now Playing to OBS
OBS lets you add Spotify’s Now Playing overlay into your stream, but how you display it depends on what suits your setup. There are two ways to integrate it. Both methods are available for both Spotify Basic and Premium users, although expect the usual ads when you’re a free member.
Still, each approach serves a different purpose. One keeps things minimal and direct, while the other adds color, animation, and style to match your stream’s aesthetics. Let’s break them down one by one.
Way 1. Use Windows Capture Feature
When to Use This Way:
If Spotify’s desktop app is your primary choice and you want a native way to display live track details without relying on third-party integration, this method keeps it simple.
OBS’s built-in Windows Capture feature lets you add the Spotify app or even a browser tab running Spotify as a source in your stream. What makes this method useful is that you’re not limited to showing the full window. You can crop any specific part: the song title, album art, or playback controls.
So that only the relevant details appear on your stream. And since this feature is natively built into OBS, you don’t need any external plugins or third-party integrations. It works smoothly on both Mac and Windows without any extra setup.
How to Add Spotify to OBS Using Windows Capture Feature:
Step 1. Open the Spotify desktop app and keep the window open. Switch to OBS Studio. Ensure that the Scenes panel is visible. If not, navigate to View > Docs > Scenes and enable it.
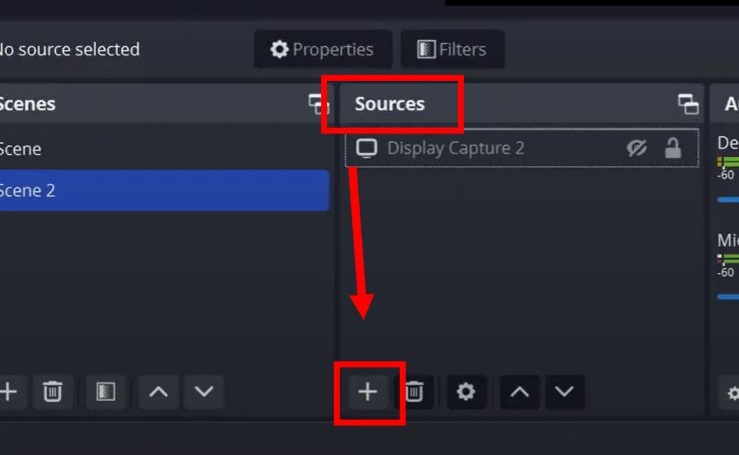
Step 2. In the Sources panel, click the + (Add Source) button at the bottom.
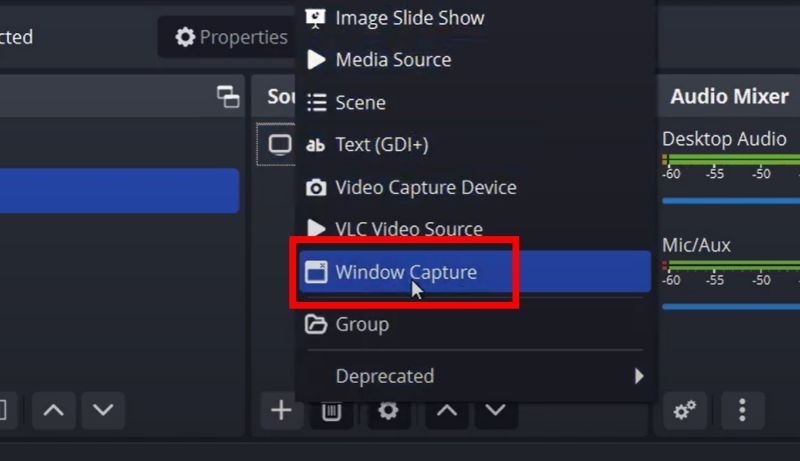
Step 3. From the list, select Window Capture.
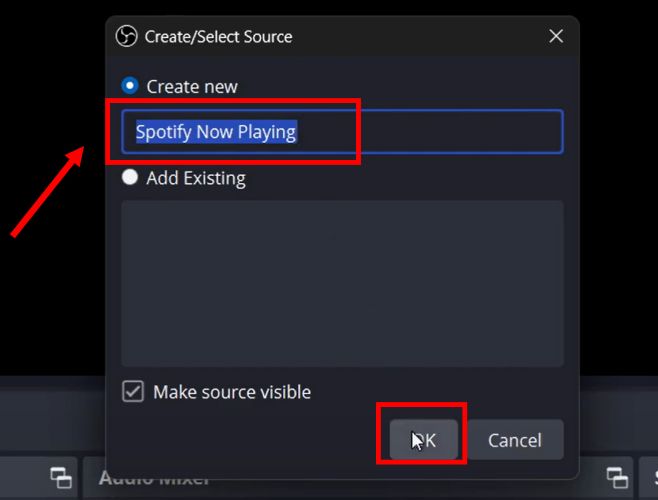
Step 4. A pop-up will appear: choose Create New option, name the source (optional), and press OK.
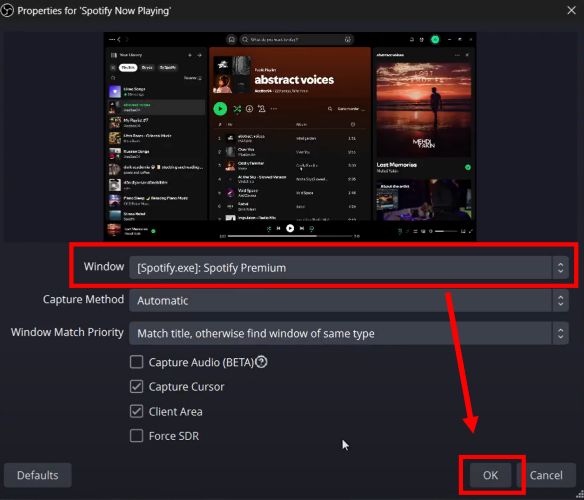
Step 5. In the Properties pop-up, locate the drop-down menu assigned to the Window option, select Spotify from the list and click OK to confirm.
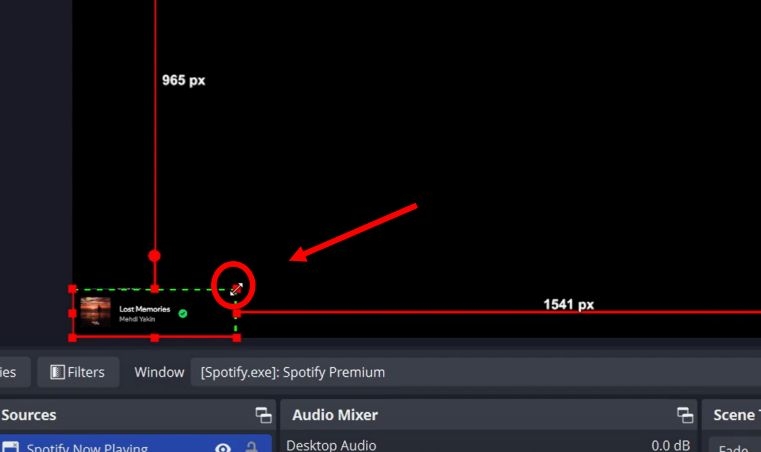
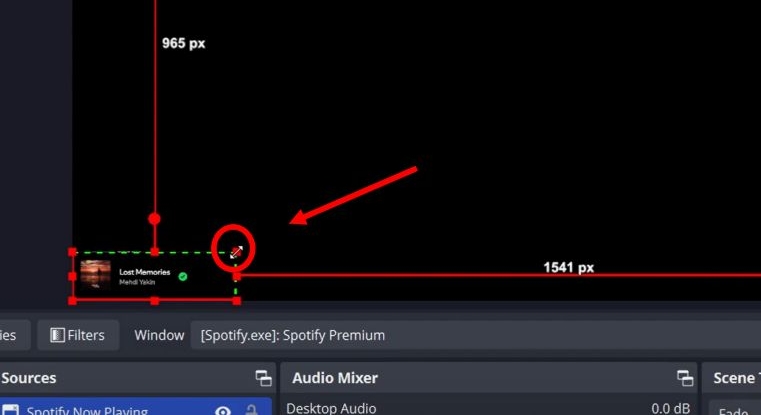
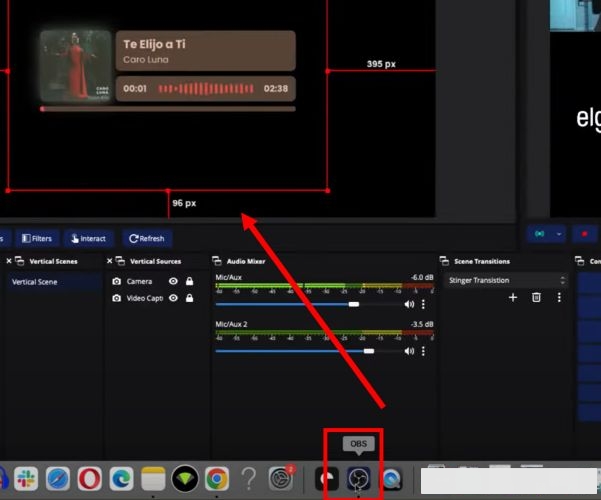
Step 6. Resize and adjust the Now Playing overlay by dragging the corner handles.
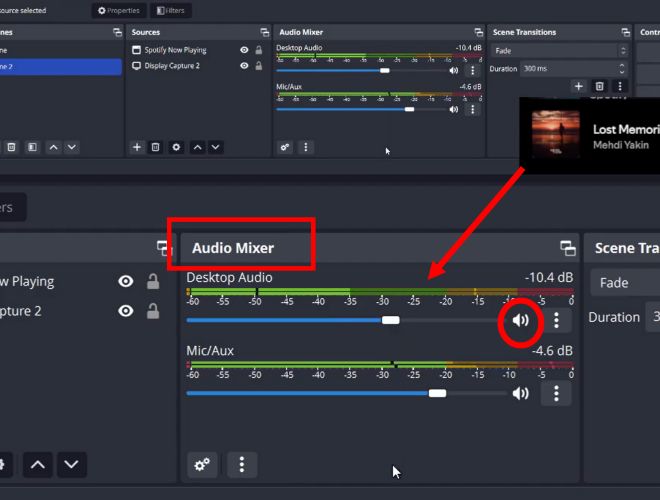
Step 7. Coming to the important part, check the Desktop Audio section in the Audio Mixer panel. If the speaker is muted, click it to unmute. Then, adjust the volume slider to balance Spotify’s audio as needed for your stream.
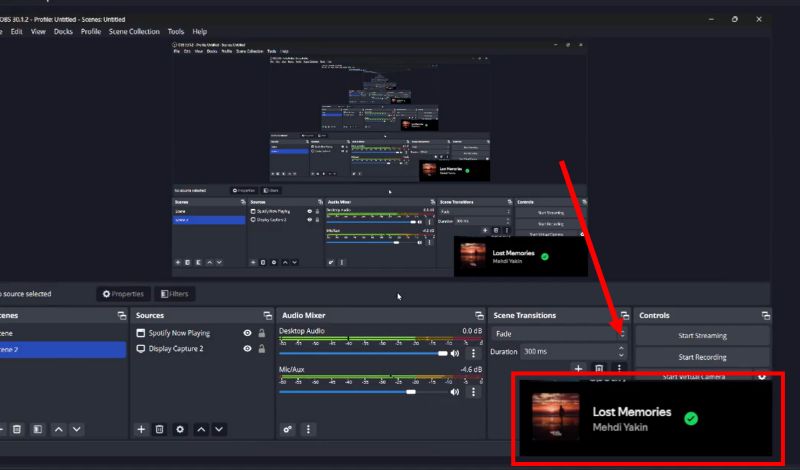
Step 8. Play a song on Spotify and check the OBS preview window. The Now Playing overlay will update in real-time, displaying the current track.
Way 2. Use Widget
When to Use This Way:
Choose this if you want more customization and visual appeal in your stream.
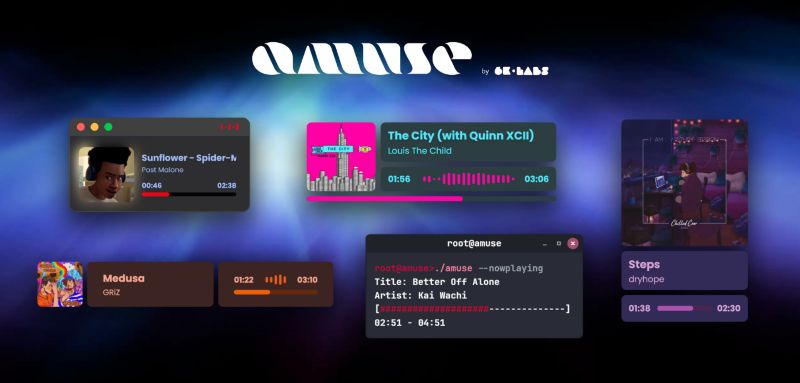
Amuse by 6K Labs is a free third-party widget designed to sync with Spotify playback on your computer’s browser. Unlike the basic overlay, this tool allows you to customize how Now Playing details appear in OBS, giving a personalized, animated touch to your streams.
Setting up Amuse Widget for OBS
Step 1. Head over to 6K Labs and navigate to the login page. You’ll see two options—Sign in with Google or Twitch. Pick whichever suits you and proceed.
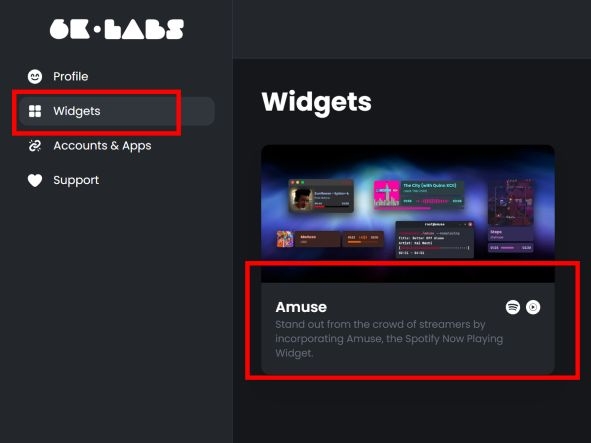
Step 2. Once logged in, find the Widgets section on the left panel. Click on it and select Amuse.
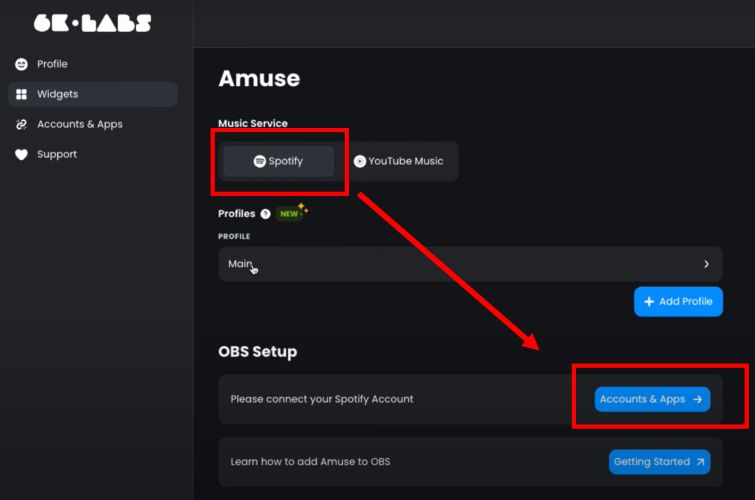
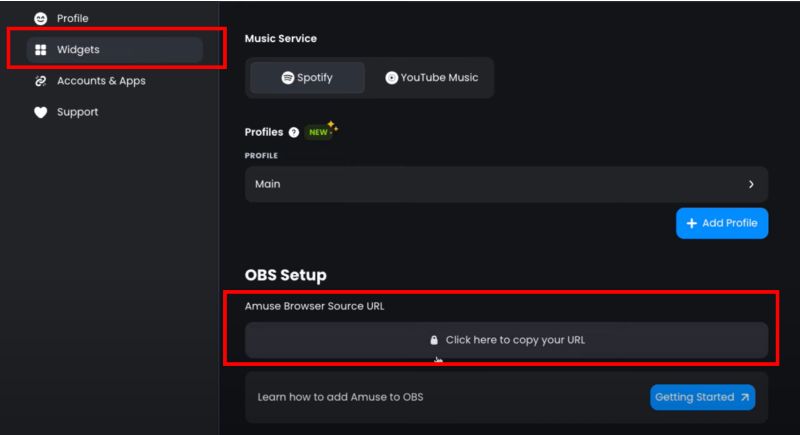
Step 3. Inside the Amuse settings, locate the Music Service section and choose Spotify. Scroll down slightly and under OBS Setup, click Accounts & Apps.
Step 4. On the Accounts & Apps page, click Learn How to Create Your App.
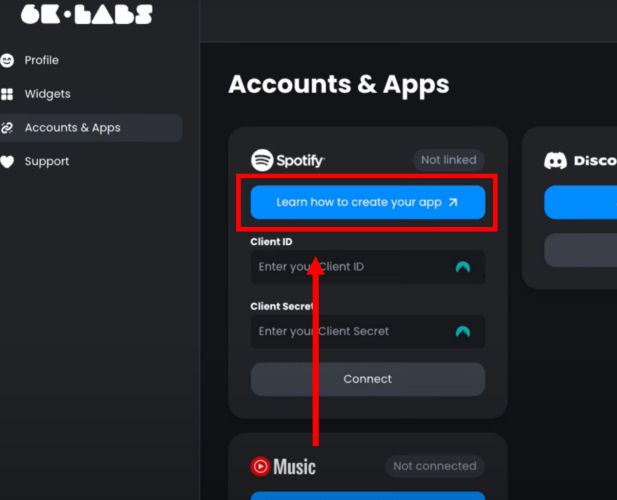
This opens the instructions for linking Spotify. Follow these:
- Visit the Spotify Developers site and log in.
- Click on your Profile Name > Dashboard.
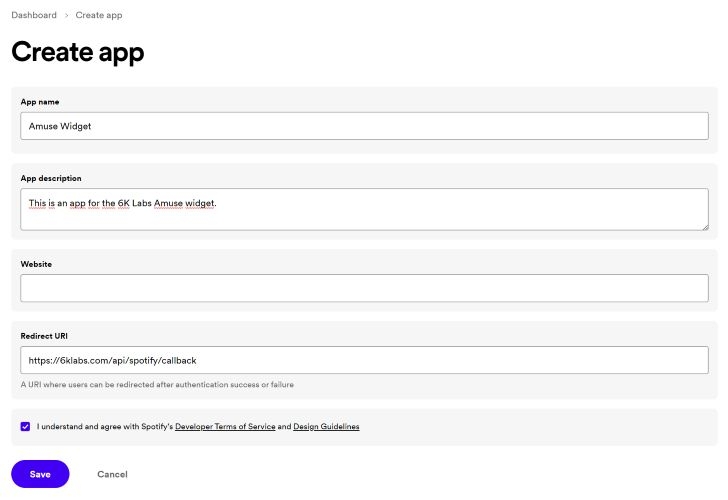
- Press Create app. Then, fill in the required details.
- Under Redirect URI, copy the URL shown on the tutorial page on 6K Labs, paste it in, and click Save.
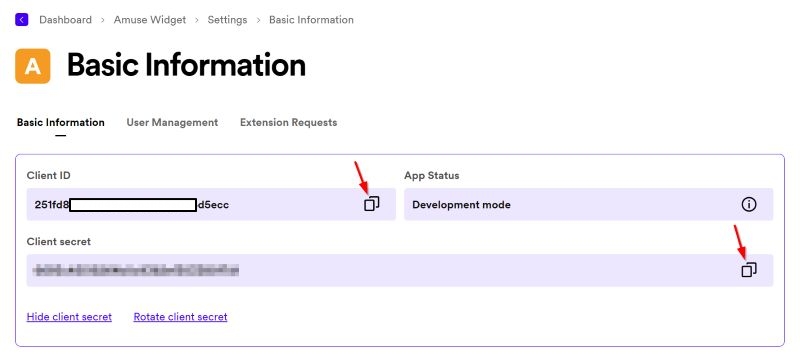
- Once the app is created, go to Settings, find Client ID and Client Secret under Basic Information. Copy both.
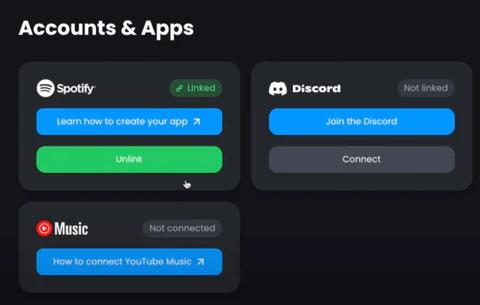
Step 5. Return to the 6K Labs dashboard. Go to the Accounts & Apps section and paste the Client ID and Client Secret in their respective fields. Click Connect.
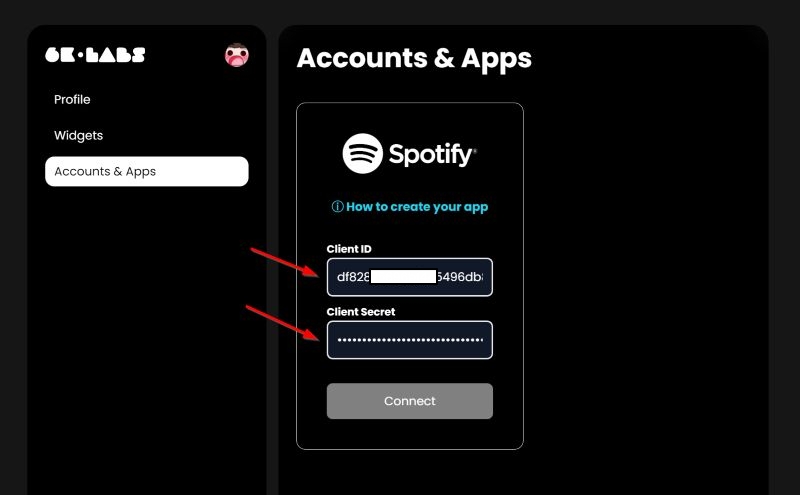
Once linked successfully, you’ll see a green confirmation Linked mark next to the Spotify icon.
Step 6. Now, go back to the Widgets section and open OBS Setup. Select Click here to copy your URL under OBS setup section. This is what will display the widget inside OBS.
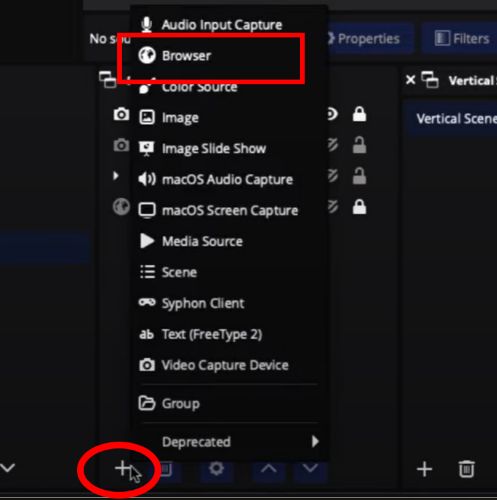
Step 7. Switch over to OBS Studio. Click Add Source (+), then select Browser from the list.
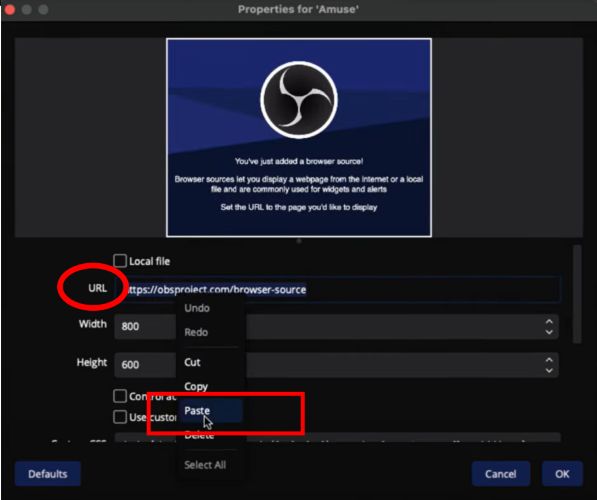
Step 8. Name the source when the pop-up appears. A properties window will appear, find the URL field and remove the existing link from it. Then, right-click on the box and select Paste to insert the copied link.
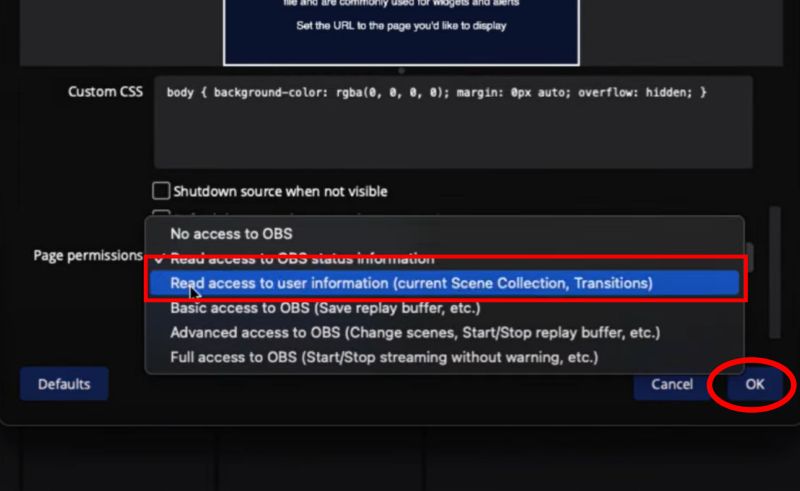
Step 9. Scroll down to Page Permissions—this step is crucial. Set Read Access to User Information (Current Scene Collection & Transitions). Click OK to save.
Step 10. The Amuse Widget’s playback interface will now be live in OBS.
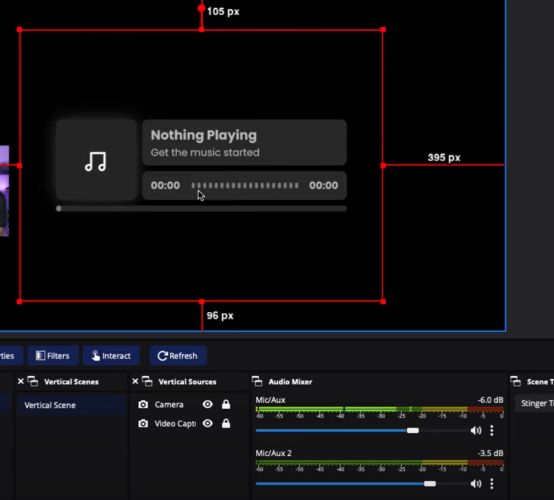
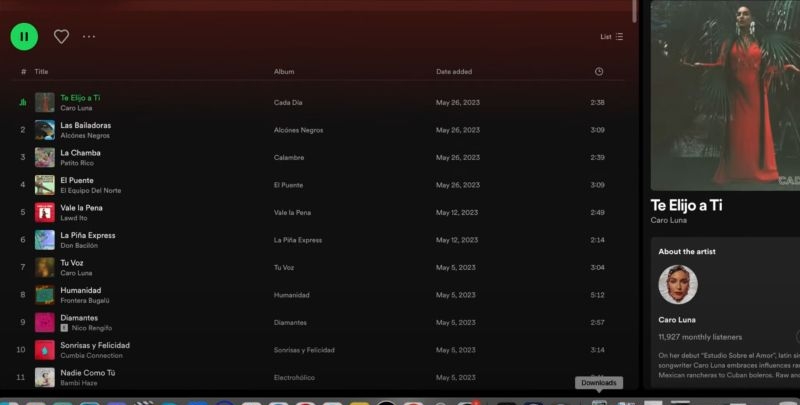
Simply play a song on Spotify in your browser.
You can resize and customize directly from the Amuse dashboard to match your stream’s aesthetics.
That’s it!
How to Add Spotify to OBS as Audio Source
When to Use This Way:
When you only need Spotify audio, either from Google Chrome or the desktop app, and don’t mind not having the visuals.
For some of you, the visibility of the Now Playing screen doesn’t matter. You just want the Spotify music to play in the background, so that your private streamers could hymn along with you.
How to Add Spotify as Audio Source in OBS:
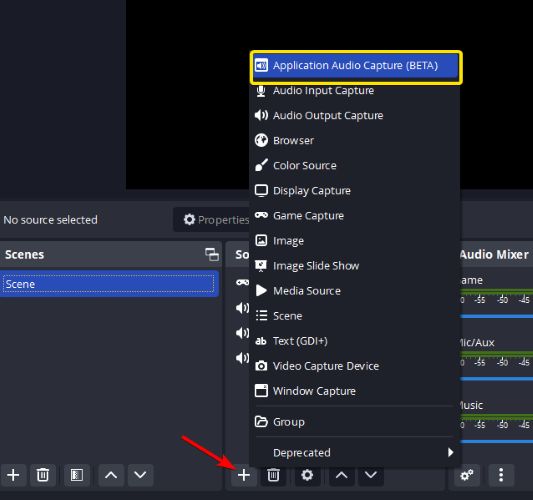
Step 1. Select Application Audio Capture (Beta) after choosing to add a source.
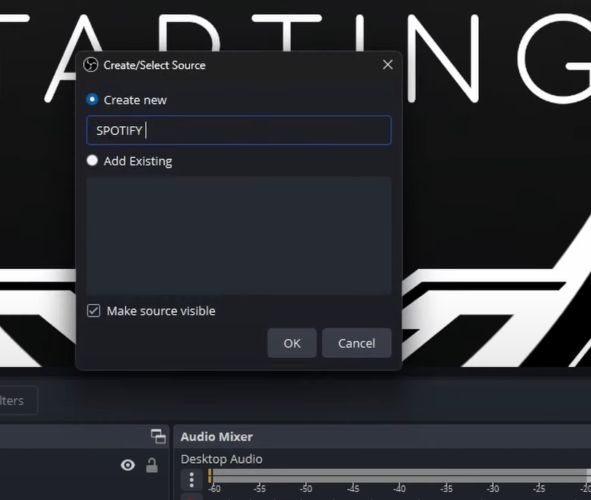
Step 2. Give your source a name: Spotify Audio. Hit OK.
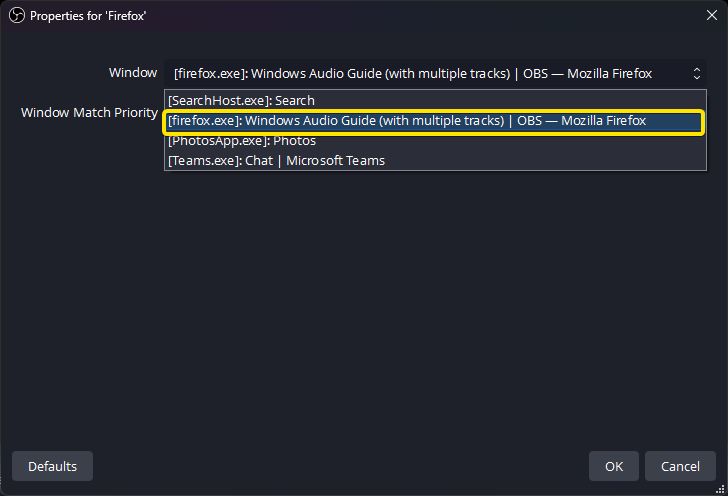
Step 3. In the properties tab, click on the drop-down next to Window. Choose a browser or desktop app (Spotify.exe).
Click OK and Spotify’s audio will now be routed into OBS.
Why Can’t I Hear Spotify on OBS?
If you’re facing sound issues, missing audio, or Spotify playback errors, it’s likely a settings issue in the OBS Studio application itself. Let’s go through the possible reasons and how to fix them.
Fix 1: Select the Correct Desktop Audio Device
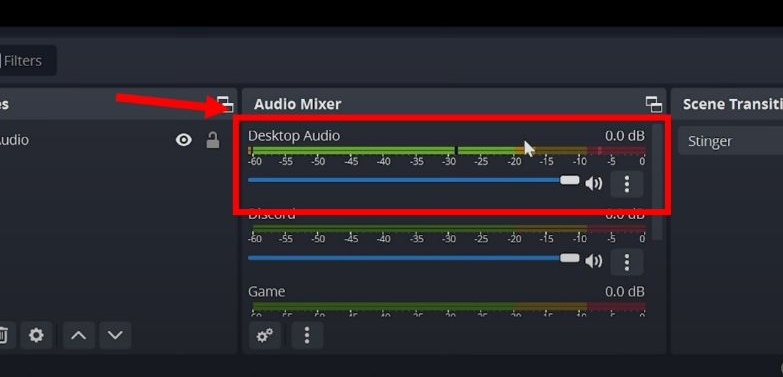
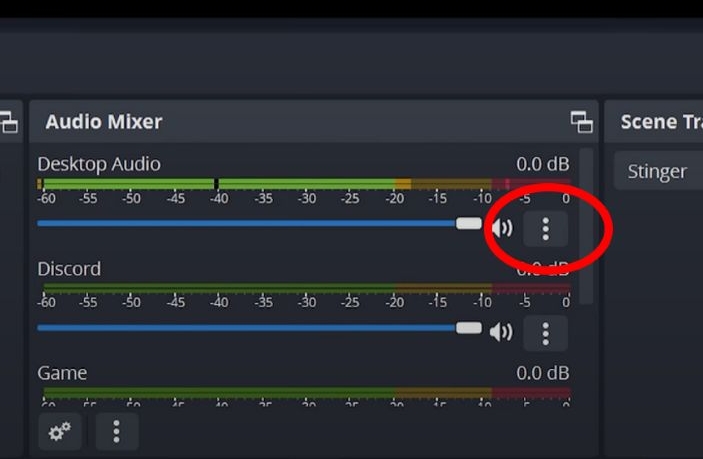
A quick way to check if Spotify’s audio is being captured by OBS is by looking at the Audio Mixer. If Desktop Audio is unmuted and receiving sound, the volume indicator should move dynamically, showing green, yellow, or red levels. If the bar stays flat or does not react to music playing on Spotify, it means OBS is not detecting the correct audio source.
Here’s how to fix:
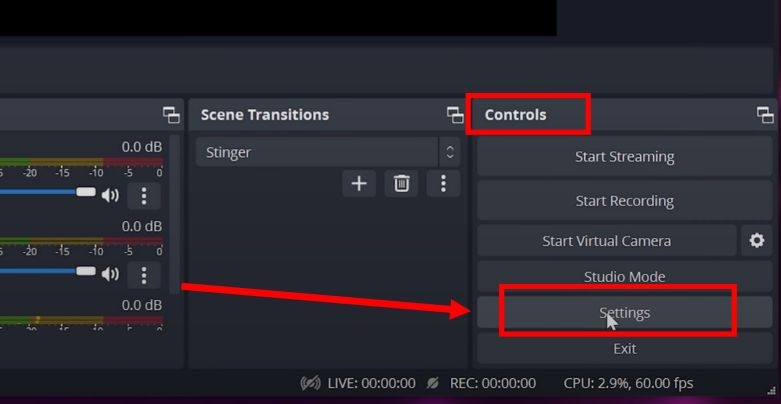
- Open OBS Studio.
- Click Settings (bottom right corner).
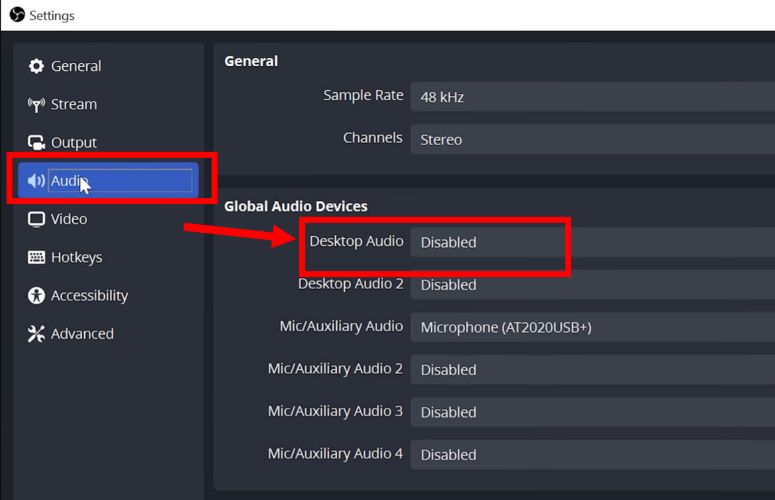
- Navigate to Audio.
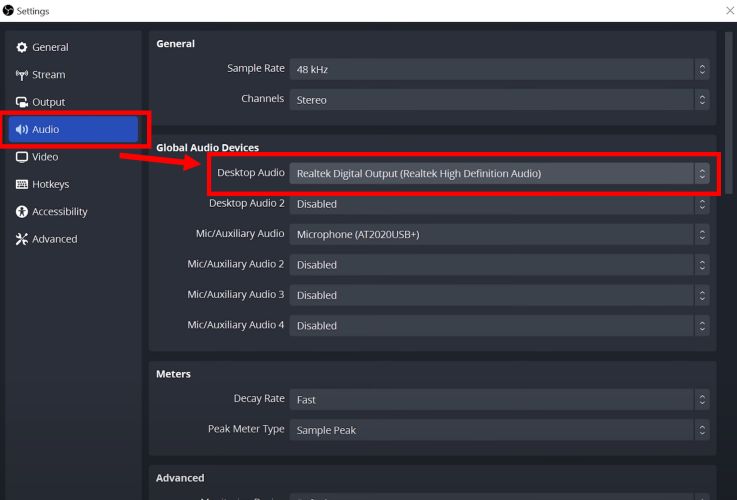
- Under Global Audio Devices, make sure that the Desktop Audio isn’t disabled. If it is, enable it by selecting the correct output device.
- Click Apply, then OK.
Fix 2: Assign Desktop Audio to the Correct Output Track
Many times you hear Spotify audio on your computer just fine, but your stream or recording doesn’t pick it up at all. This happens when desktop audio isn’t assigned to the correct audio tracks. Here’s how to check this:
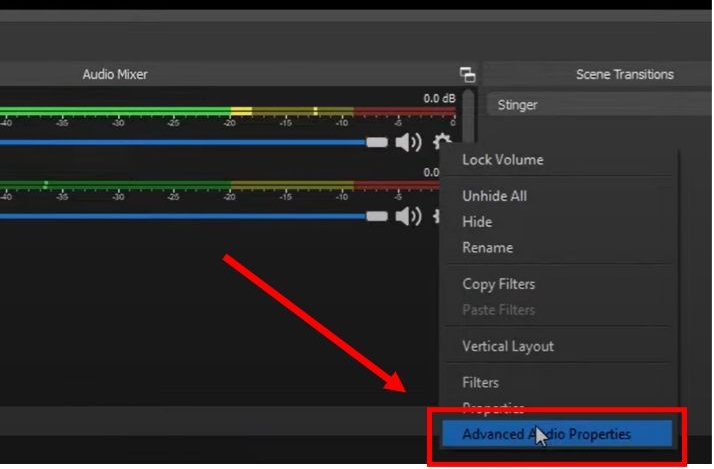
- Click the three dots next to Desktop Audio in the Audio Mixer.
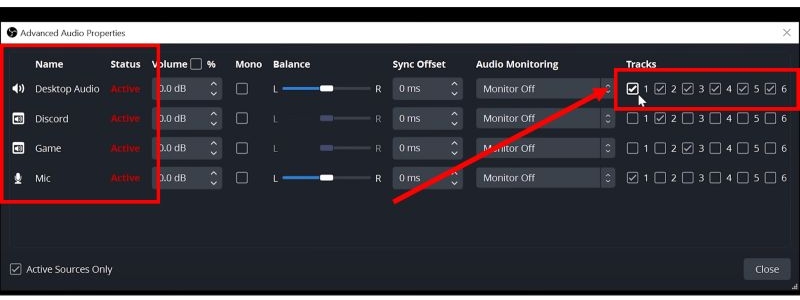
- Select Advanced Audio Properties.
- Look for Desktop Audio and make sure multiple audio tracks are checked. If tracks aren’t selected, proceed to the next steps to fix it.
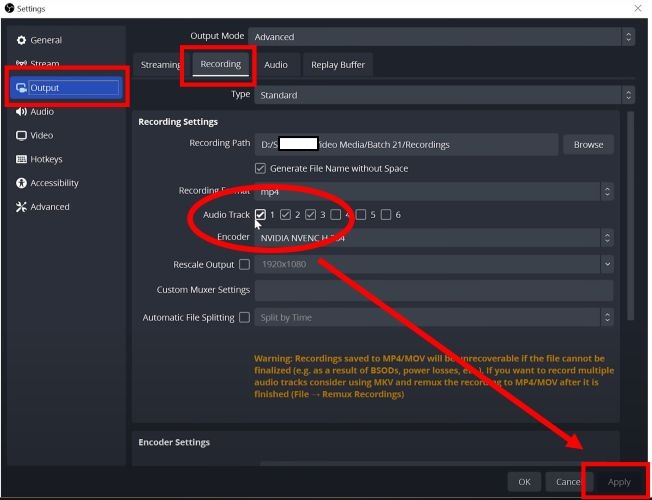
How to fix it:
- Open Settings in OBS.
- Click on Output.
- At the very top, change Output Mode to Advanced.
- Navigate to the Recording tab.
- Ensure that multiple audio tracks are checked.
- Click Apply > OK.
Fix 3: Check Volume Mixer
OBS might not be receiving audio simply because its sound is muted in the Windows Volume Mixer. This is a common issue on Windows devices.
How to check and fix it:
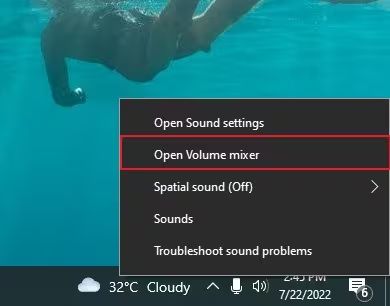
- Right-click on the speaker icon in the bottom-right corner of the taskbar.
- From the options, select Open Volume Mixer.
- In the Volume Mixer window, locate OBS Studio.
- Ensure that OBS is unmuted and has its volume set properly.

Wrap Up
That should cover all the bases. You’ve now learned how to add Spotify to OBS in multiple ways: bringing its Now Playing screen, using customizable overlays, or setting it up as an audio source. However, the best way to bring Spotify music into OBS is the one that lets you do it without interruptions, ad-playback, or streaming limitations.
And that is made possible by StreamFox for Music. As mentioned, StreamFox allows you to convert Spotify songs at 320kbps and use them freely. The best part? You don’t even need an active membership to save as many tracks as you want.